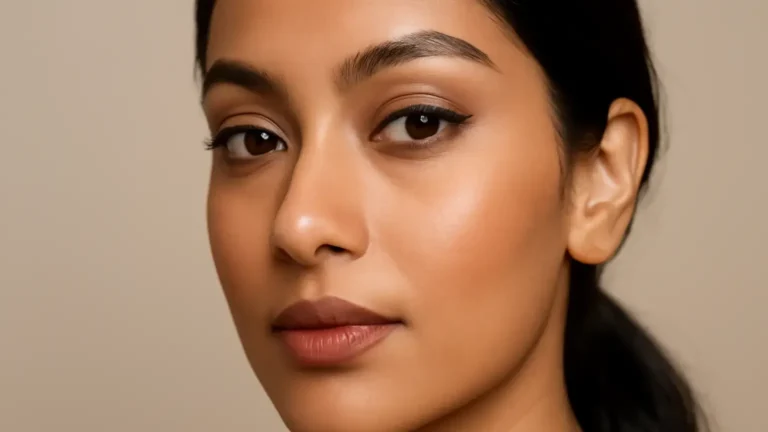
Makeup basics for highlighter are simpler when you choose the formula before the finish: powder suits oily or humid skin, cream gives a skin-like sheen, and liquid offers the most fluid glow. This guide is for beginners comparing textures, skin concerns and application methods. You will learn where to place highlighter, how to build intensity gradually, and how to avoid making pores or dry patches look more noticeable.
Start with the formula, not the shade
Highlighter is makeup designed to reflect light on selected high points of the face. The right formula can make the skin look fresh and dimensional; the wrong one can sit on dry patches, increase shine or draw attention to pores. Before choosing champagne, gold, rose-gold or another shade, decide whether your skin and routine need powder, cream or liquid.
There is no universally best highlighter. Your choice depends on skin type, the finish you like, the climate you live in and whether you prefer quick application or more control. In India, heat, humidity and perspiration may make a long-wearing powder more practical for some people, while air-conditioned environments or winter dryness may make a cream formula more comfortable.
Powder highlighter: the easiest controlled glow
A powder highlighter is a pressed or loose powder applied over foundation, concealer and usually setting powder. It gives the most controlled placement and is often the simplest option for beginners who want to see exactly where the shine is going.
- Finish: soft satin to intense metallic, depending on the formula and number of layers.
- Best for: combination or oily skin, humid conditions and anyone who prefers a polished finish.
- Application: use a small tapered brush, tap off excess and sweep lightly over the cheekbone.
- Watch-out: very reflective powder can emphasise visible pores, flakes or uneven texture when applied heavily.
For a natural glow makeup look, choose a finely milled powder with a satin sheen rather than chunky shimmer. Pressing the brush gently into the skin usually looks smoother than repeatedly buffing the same area. If your forehead or nose becomes shiny during the day, keep the highlighter to the upper cheekbones and use less on the centre of the face.
Cream highlighter: a skin-like, flexible finish
A cream highlighter has a balm, stick or mousse-like texture. It blends into foundation and can create the most believable sheen because it does not always sit as a separate layer on top of the base.
- Finish: natural, satin or dewy, depending on the amount applied.
- Best for: normal to dry skin, minimal makeup routines and people who like a fresh, lived-in finish.
- Application: warm a small amount on your fingertip or use a damp sponge, then tap rather than rub.
- Watch-out: a rich cream may move foundation underneath or become too glossy on an oily T-zone.
A cream highlighter is useful when your base is still slightly moist. Apply it after foundation and before setting powder, using thin layers. If you need longer wear, dust a small amount of matching powder highlighter on top, but stop as soon as the sheen is visible.
Liquid highlighter: the most blendable and customisable option
Liquid highlighter is a fluid pigment that can be used alone, mixed with base makeup or layered over foundation. It gives you plenty of control over intensity, but its runny texture can be less forgiving if you apply too much at once.
- Finish: sheer radiance to a glassy, dewy makeup look.
- Best for: normal to dry skin, sheer base routines and experienced beginners who enjoy mixing products.
- Application: place one small dot on the back of your hand, pick it up with a sponge or fingertip and tap onto the skin.
- Watch-out: applying it directly from a dropper or doe-foot can create an overly bright patch or disturb the base.
For a softer result, mix a tiny amount into moisturiser or foundation. Do not add liquid highlighter to a full bottle of base product, because this can alter its texture and preservation. Test the finish in daylight before adding more.
How to choose highlighter for your skin type
Highlighter for oily skin
Choose a lightweight powder or a thin, quick-setting cream. Keep the glow to the upper cheekbones and avoid placing a very wet product beside the nose, across active shine or on the centre of the forehead. A matte or softly set base underneath helps the highlight look intentional rather than greasy.
Highlighter for dry skin
Cream and liquid formulas generally sit more comfortably on dry-looking areas. Prepare the skin with moisturiser, allow it to settle, then use a small amount of product. Heavy powder can catch on flakes, so if you prefer powder, select a satin formula and use a soft brush with a light hand.
Highlighter for textured skin
Texture does not mean you must avoid glow. The key is to use a less metallic formula and apply it only where light naturally catches. A cream or finely milled satin powder may be more flattering than large shimmer particles. Do not sweep highlighter across the entire cheek if you want to minimise the appearance of pores; concentrate it higher on the cheekbone and blend the edges.
Where to place highlighter for a balanced result
Placement should follow the shape and movement of your face rather than a rigid diagram. Start with one or two areas, then assess the result from a normal viewing distance.
- Upper cheekbones: place the main cheekbone highlight from the outer cheek towards the temple, stopping before the hairline if the product is intense.
- Brow bone: add a very small amount below the highest part of the brow for lift. Avoid covering the entire brow bone with shimmer.
- Inner corners: a pinpoint of light at the inner corner can make the eyes look more awake. Use a small brush and a subtle shade.
- Bridge of the nose: use a narrow, soft line or a single tap. A wide stripe can make the nose appear broader.
- Cupid’s bow: a tiny touch can define the upper lip, but too much may look wet or overly reflective.
For everyday makeup, the upper cheekbones and inner corner highlight are usually enough. The tip of the nose and cupid’s bow are optional, especially in bright sunlight or humid weather.
How to apply highlighter for beginners
Good application is mostly about quantity and pressure. Follow this simple routine:
- Finish your complexion base and decide whether the skin should remain dewy or be lightly set.
- Choose one formula. Avoid combining several textures until you understand how each behaves.
- Use a small amount; start at the back of your hand rather than applying a large stripe directly to the face.
- Tap the product onto the high point, then soften only the edges. Excessive rubbing can lift foundation.
- Step back from the mirror and check the result in daylight or neutral indoor light.
- Add a second thin layer only where you want more intensity.
For powder, use a tapered brush. For cream, fingers or a damp sponge can provide a seamless finish. For liquid, a sponge usually gives the most controlled diffusion. Clean tools regularly, particularly when working around the eyes.
Can you layer cream, liquid and powder?
Makeup layering can increase longevity, but more layers do not always create a better glow. A practical combination is liquid or cream underneath, followed by a very light veil of powder on top. This works best when both products have a similar undertone and the first layer has been pressed into the base.
Do not layer a wet liquid over a fully powdered complexion without tapping carefully; it may create a patchy spot. Likewise, avoid placing powder over a thick cream if the surface has not settled. For beginners, use one formula on ordinary days and reserve layering for occasions when you want extra dimension.
Common highlighter mistakes to avoid
- Using too much: an intense stripe is difficult to soften. Build gradually instead.
- Highlighting texture indiscriminately: reflective particles naturally draw attention, so keep them away from areas you do not want to emphasise.
- Choosing a shade that is too light: a stark silver or white can look chalky. Select a shade that is close to your skin depth with a compatible undertone.
- Ignoring the base: dry, unblended foundation or excess setting powder can make any highlighter look uneven.
- Using the same brush for everything: a large fluffy brush can spread shimmer too far, while a tiny dense brush may create a harsh patch.
- Judging only in a close mirror: check the makeup from normal conversation distance and in more than one type of light.
Quick decision guide
Choose powder if you want control, longevity and a polished finish, particularly for oily or combination skin. Choose cream if you want a natural, skin-like sheen and easy tapping application. Choose liquid if you prefer a sheer glow that can be mixed or customised. If you have visible texture, prioritise finely milled or satin products and apply less than you think you need.
The best makeup basics for highlighter approach is simple: match the formula to your skin and routine, apply light to the high points, and stop before the finish becomes distracting. Highlighter should support the complexion, not compete with it.
Products that may help with this routine
Choose only what fits your skin, hair or personal needs. Use the links below to view current options on Amazon India.
Frequently Asked Questions
What is the best highlighter for textured skin?
A finely milled satin powder or a thin cream highlighter is often easier to control on textured skin than chunky shimmer. Apply a small amount only to the upper cheekbone and blend the edges.
What is the difference between cream vs powder highlighter for beginners?
Cream highlighter gives a softer, skin-like sheen and is applied by tapping, while powder highlighter offers more controlled placement and usually better wear on oily or humid skin.
How do you apply highlighter for beginners?
Apply a small amount to the upper cheekbones using a fingertip, sponge or tapered brush, tap rather than rub, soften the edges and build only if needed.
Is liquid highlighter good for oily skin?
It can work when used sparingly on the cheekbones, but a lightweight powder is often easier to control on oily skin. Avoid placing a wet liquid formula over areas that already become shiny.
Where should beginners apply highlighter?
Start with the upper cheekbones. You can add a tiny amount to the inner corners, brow bone, bridge of the nose or cupid’s bow, depending on the look you want.
Can you layer cream and powder highlighter?
Yes. Apply a thin cream layer first and lightly set it with a compatible powder highlighter. Too much of either product can emphasise texture or disturb the base.