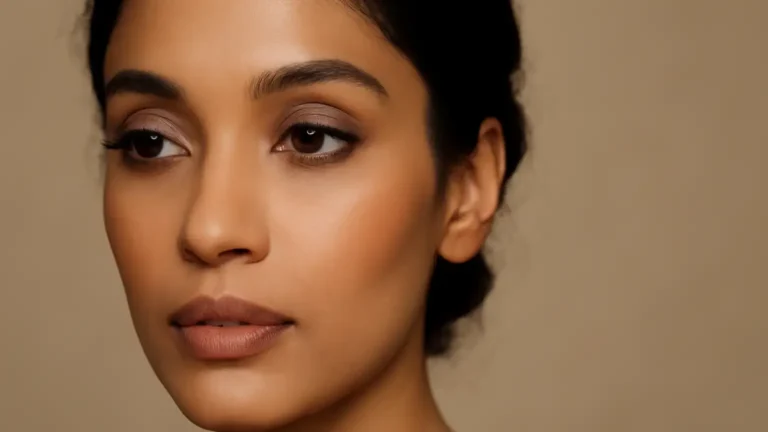
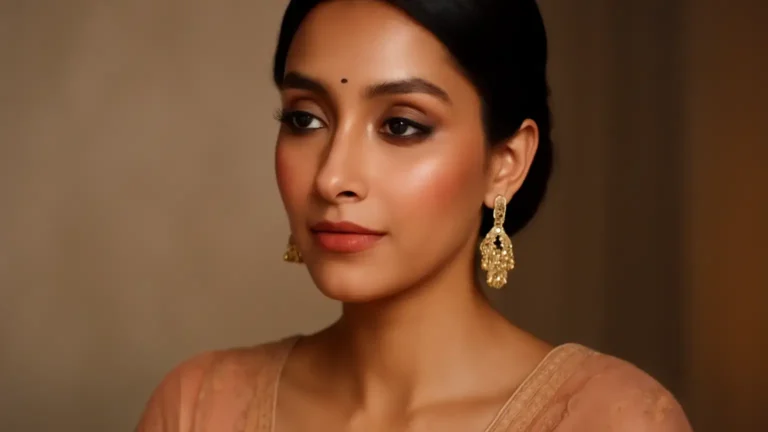
Makeup Basics for Blush become much easier when you choose the formula around your skin and finish: cream gives a fresh, skin-like flush, while powder offers easier control and longer wear. This guide is for beginners who want clear placement, simple brush-or-finger techniques, and even colour in India’s varied weather. Start with a small amount, place it deliberately, and build thin layers rather than trying to correct an intense first swipe.
Blush can make a complexion look more awake, balanced and dimensional, but it is also one of the easiest products to overapply. The right formula matters, yet placement, skin preparation and the amount used usually determine whether the result looks softly flushed or visibly patchy.
Cream blush versus powder blush: which should you choose?
The simplest distinction is texture. Cream blushes contain emollient ingredients that spread across the skin and usually leave a satin or dewy finish. Powder blushes are finely milled pigments that sit on top of the complexion and can look matte, soft-focus or subtly luminous depending on the formula.
Cream blush
- Best for: normal, dry or dehydrated-looking skin, and anyone who prefers a natural blush look.
- Finish: skin-like, fresh and often slightly dewy.
- Strength: it can melt visually into foundation and is easy to sheer out with fingers.
- Caution: applying it over a wet or unset base may lift foundation or leave uneven marks.
Powder blush
- Best for: oily skin, humid days, or anyone who wants a matte finish and more predictable wear.
- Finish: matte, satin or luminous, depending on the product.
- Strength: it is simple to control with a brush and works well over a set base.
- Caution: too much powder on dry patches can emphasise texture or look dusty.
There is no universal winner in the cream blush vs powder blush choice. For dry skin, a thin cream layer may look more comfortable, followed by a light veil of powder only where needed. For oily skin, powder is often the easier starting point, although a long-wearing cream formula can work if it sets down without remaining slippery. In hot or humid Indian weather, test how the formula behaves with your sunscreen and base before relying on it for a long day.
Prepare the base before applying blush
Good blush application starts before the colour reaches the cheeks. Apply moisturiser suited to your usual routine, allow it to settle, then use sunscreen during the day. Give sunscreen and complexion products a short moment to set rather than immediately rubbing several layers together.
Makeup base preparation is especially important with cream products. If the foundation is still tacky, press the blush on instead of dragging it. If the base is very wet, lightly set only the areas where you want more control. Powder blush needs a smooth, even surface, but do not automatically powder the entire face if you want a fresh finish.
Before choosing a shade, consider your undertone and the effect you want. Peach and coral shades can bring warmth, rose and berry shades can look fresh and lively, while muted terracotta and brown-rose tones can create gentle definition. Blush for Indian skin tones is not limited to one colour family; medium and deep complexions can wear both vivid and muted shades when the depth and undertone are balanced.
Blush placement makeup basics by face shape
Face-shape guidance is a starting point, not a rule. Place blush where it gives the proportion or mood you want, then adjust while looking at your face from the front rather than relying only on a side view.
Round face
For a softly lifted effect, begin slightly above the cheek apples and sweep colour outward towards the upper ear or temple. Keep the strongest pigment away from the centre of the cheeks. If you want a cute, youthful flush instead, place a small amount on the apples and blend outward so the colour does not become a round patch.
Oval face
Oval faces can suit a balanced application across the upper cheek area. Smile gently to find the cheek apples, then blend upward and outward along the cheekbones. Avoid taking the colour too close to the nose, where it can make the centre of the face look congested.
Long or oblong face
Place blush more horizontally across the fullest part of the cheeks and soften it towards the ears. This can create visual width. Keep the blend controlled rather than extending it high into the temples, unless you specifically want a lifted editorial effect.
Square face
Focus on the fleshy part of the cheeks and use rounded blending motions to soften the overall appearance. A little colour above the cheekbones can add lift, but a very sharp diagonal stripe may make the makeup look harder.
Heart-shaped face
Apply colour to the outer portions of the cheeks, slightly below the highest point of the cheekbones, and blend towards the temples. This helps balance a broader forehead with a narrower lower face without placing too much pigment near the nose.
These blush placement by face shape suggestions should remain flexible. Placement also changes with the desired effect: low and central placement looks softer and more youthful, high outward placement looks lifted, and a broader horizontal blend gives a sun-touched appearance.
How to apply blush for beginners: a simple routine
- Choose a small starting amount. Pick up less product than you think you need. It is easier to build than to remove.
- Locate the placement zone. Use the cheekbone, not the nose, as your outer guide. Keep the first deposit slightly away from the nostril.
- Place before blending. Tap cream onto one cheek at a time, or touch a brush into powder and remove excess on the back of your hand.
- Blend the edges, not all the pigment away. Use short tapping motions for cream and light circular or sweeping motions for powder.
- Step back and check symmetry. Compare both sides with a relaxed face. Add only where the balance needs correcting.
For blush application with fingers, use the pads of the middle and ring fingers rather than the palm. Warm a tiny amount between the fingertips, tap it high on the cheek, and press the edges until they fade into the base. Clean hands are essential, and fingers may be less suitable if touching the face tends to disturb your foundation.
A brush offers more control once you know how much pigment you need. A medium, soft, slightly tapered brush is a useful best blush brush for beginners because it can place colour precisely while diffusing the border. Dense brushes deposit more pigment quickly; fluffy brushes create a softer wash. For powder, tap off excess before the first contact. For cream, a duo-fibre brush or compact synthetic brush can spread the formula without absorbing too much.
How to build colour without patchiness
Patchiness usually comes from a combination of excess product, an unsettled base, dry texture or repeated rubbing. Use this layering method:
- Apply the first layer so sheer that you are briefly unsure whether it is enough.
- Wait a few seconds, then inspect the edges in natural light if possible.
- Add a second thin layer only to the centre of the placement zone, not all over the existing blend.
- Soften the perimeter with a clean fingertip, sponge or mostly clean brush.
- Stop when the colour is visible at a conversational distance. Blush often looks stronger after the rest of the makeup is complete.
When learning how to layer cream and powder blush without patchiness, apply cream first and let it settle for a moment. Then use a very small amount of coordinating powder blush to reinforce the centre and improve wear. Avoid placing a dry powder directly over a still-slippery cream, as the powder can grab in spots. If you prefer a luminous finish, powder only the high-friction areas rather than covering the whole cheek.
Blush blending techniques should match the formula. Press and tap creams; sweep powders lightly. Do not scrub back and forth over a textured or partly set base. If one area becomes too intense, soften it with the clean side of a damp makeup sponge or lightly press leftover foundation from the sponge over the edge. Adding more powder is not always the best fix.
Common blush mistakes and quick fixes
- Starting with too much: remove excess from the brush or fingertip before it touches the face.
- Placing colour too close to the nose: leave a small gap and blend inward only at the end.
- Using the same tool for every formula: a dense brush can overload sheer powder, while fingers may disturb a wet base.
- Ignoring the finish of the base: a dewy cream over an unset dewy foundation can slide; a matte powder over visibly dry skin may look rough.
- Matching both cheeks by adding more: if one cheek is stronger, reduce it first or diffuse its edge instead of endlessly intensifying the other side.
- Expecting one shade to suit every look: a soft everyday shade and a deeper evening shade can be more useful than one highly pigmented universal colour.
How to make blush last all day
Long-lasting blush depends on thin layers and compatible textures more than on heavy application. Start with a well-set base where needed, use a cream or stain-like layer for underlying colour, and lightly reinforce it with powder if your skin becomes oily or the weather is humid. Avoid applying thick moisturiser directly beneath the blush unless your skin needs it and the products have had time to settle.
Carry a clean tissue or blotting paper if shine develops. Press rather than rub, then touch up only the areas where colour has faded. A setting spray may help the finished layers look more cohesive, but it should not be used as a substitute for sensible placement and thin application.
Concise takeaway
In Makeup Basics for Blush, the reliable method is simple: choose cream for a fresh, skin-like finish or powder for easy control and wear; prepare the base; place colour according to your desired lift and face shape; then build in thin layers. Use tapping motions for cream, light sweeps for powder, and always soften the edges before adding more pigment.
Products that may help with this routine
Choose only what fits your skin, hair or personal needs. Use the links below to view current options on Amazon India.
Frequently Asked Questions
How do you apply blush for beginners step by step?
Prepare and lightly set your base where needed, place a small amount above or on the cheek apples, blend outward, then add thin layers until the colour is visible but even. Use tapping motions for cream and light sweeping motions for powder.
Should beginners choose cream blush or powder blush for dry skin?
Cream blush is often the more comfortable starting point for dry-looking skin because it can give a skin-like finish. Apply it over a settled base and avoid rubbing over flaky or uneven areas.
Where should you place blush for a round face?
For a lifted look, begin slightly above the cheek apples and blend outward towards the upper ear or temple. Keep the strongest colour away from the centre of the cheeks.
How do you layer cream and powder blush without patchiness?
Apply a sheer cream layer first and allow it to settle briefly. Add a small amount of coordinating powder only to the centre or areas needing more wear, using a light hand and a soft brush.
How much blush should a beginner use?
Start with less than a pea-sized amount of cream or a lightly tapped brush of powder for both cheeks. Build gradually because adding colour is easier than correcting an overly strong first layer.
How can you make blush last all day?
Use compatible, thin layers over a settled base and lightly reinforce cream blush with powder if needed. Blot oil by pressing tissue or blotting paper rather than rubbing, then touch up only faded areas.