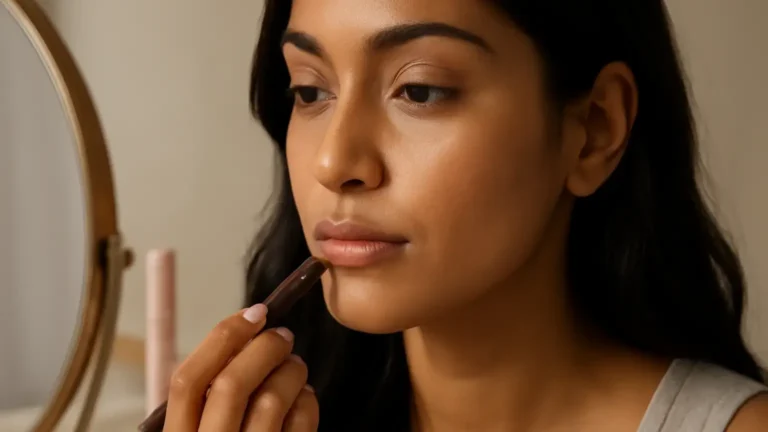
Makeup basics for mascara become much easier when you match the wand to your goal, curl before applying product and keep coats thin. This guide is for anyone who wants lifted, separated lashes for an everyday Indian makeup look or a more defined festive finish. The key decision is simple: use a slim or curved wand for definition, a fuller brush for volume, and pause between coats so the formula does not join lashes together.
Mascara can make eyes look more awake in under a minute, but the result depends on more than sweeping a brush through the lashes. A heavy brush, too much product or a second coat applied before the first has settled can quickly create spikes, flakes and dark marks under the eyes.
For a clean finish, think of mascara as a small routine with five decisions: select the wand, curl at the right time, work from root to tip, space out your coats and remove the product gently. These steps work for minimal daytime makeup as well as festive looks that need extra definition.
1. Choose the wand for the lash effect you want
The brush shape controls how much product reaches the lashes and how easily you can reach the inner and outer corners. Before choosing a formula, decide whether your priority is separation, length, volume or hold.
- Slim or narrow wands: These are useful for short lashes, inner corners and controlled everyday definition. They reduce the chance of coating too many lashes at once.
- Curved wands: A curved brush can support a lifted appearance, especially when its shape follows your lash line. It is helpful when you want a soft lash lift effect rather than dramatic volume.
- Rubber or flexible comb-style wands: These tend to separate lashes well and can be a practical choice if your main concern is clumping.
- Full, dense brushes: These deposit more formula and suit people who want bold, volumised lashes. Use them with a light hand because excess product can weigh down a curl.
- Tapered wands: The pointed end can reach small corner lashes, while the wider part builds definition across the centre.
A lengthening mascara usually works well with a slim, precise brush, while a volumising mascara often comes with a fuller brush and a richer formula. Neither is automatically better. If your lashes are fine or straight, a lighter formula and separated application may look more lifted than a thick coat.
2. Curl before mascara, not after
If you use a lash curler, make it the first eye-makeup step after your lashes are clean and dry. Curling after mascara has dried can make the product crack, pull on the lashes or leave an uneven bend.
A safer curling sequence
- Open the lash curler fully and place it close to the lash roots without pressing the skin.
- Hold gently for about five to eight seconds. Avoid repeated hard squeezing.
- For a rounded lift, move slightly towards the middle of the lashes and press more lightly for a few seconds.
- Check the rubber pad regularly and replace it if it becomes worn, stiff or split.
Do not curl wet lashes or lashes covered in oily eye cream, as the tool may not grip evenly. For very straight lashes, a modest curl at the roots is usually more natural and comfortable than trying to create a sharp angle. If you do not use a curler, a curved wand and careful root placement can still give some lift.
3. Use a root-to-tip technique with a clean wiper
The root-to-tip technique is one of the most reliable mascara application tips for defined, clump-free lashes. Start with the wand at the base, wiggle it gently once or twice, then pull through to the tips in one controlled motion. The small movement at the roots distributes product where it gives the most visible definition; the upward sweep separates and lengthens.
Before the first stroke, remove extra product from the wand by wiping it lightly on the inside of the tube opening or on a clean tissue. Do not pump the wand repeatedly, since that pushes air into the tube and can make a fresh mascara formula dry faster.
- Look slightly down into a mirror for upper lashes so you can see the roots without lifting your chin too much.
- Use the wand vertically for the inner and outer corners rather than forcing the full brush sideways.
- Keep the first coat light at the tips. Too much weight at the ends can pull down the curl.
- For lower lash application, turn the wand upright or use only the tip and touch each lash carefully.
For an everyday look, one slow coat may be enough. For a festive look, focus a little more product on the outer upper lashes to create definition, but keep the inner corners lighter so the eyes do not look crowded.
4. Build mascara in thin, spaced coats
Mascara layering works best when each coat has time to settle. You do not need to wait until the lashes feel completely hard, but allow roughly 30 to 60 seconds between coats. This short pause helps the second layer grip instead of dragging the first layer into thick points.
| Desired finish | Practical approach |
|---|---|
| Natural daytime definition | One thin coat, concentrated at the roots and brushed through the tips. |
| Longer-looking lashes | Use a lengthening mascara, let the first coat settle, then add a very light second coat to the tips. |
| Full festive volume | Choose a volumising mascara and build two controlled coats rather than one thick layer. |
| Humidity-prone days | Use a formula labelled for longer wear, concentrating product at the roots and avoiding heavy lower lashes. |
How many coats of mascara should you apply? For most people, one to two coats are sufficient. A third coat is more likely to create clumps unless the formula is very light and the lashes are brushed through between applications. If lashes begin sticking together, stop adding product. Use a clean spoolie brush while the mascara is still slightly workable to separate them gently.
Waterproof mascara can be useful for rain, tears, long celebrations or humid weather, but it is not essential for every day. It may feel drier and usually needs more careful removal. For regular use, choose the lightest formula that gives the hold you actually need. This helps preserve a comfortable, flexible finish.
5. Remove mascara fully without rubbing
Good mascara removal is part of a clump-free routine because leftover product can make the next application uneven. It also reduces the temptation to scrub the delicate eye area in the morning.
- Soak two cotton pads with a suitable eye makeup remover or a gentle cleansing product designed for the eye area.
- Hold the pads over closed eyes for several seconds to soften the mascara, especially if it is waterproof.
- Wipe downwards and outwards with light pressure. Use a fresh section of the pad for each pass.
- Clean the lash line and corners carefully, then rinse or cleanse according to the product instructions.
- Pat dry rather than dragging the skin.
How to remove mascara without rubbing eyes comes down to contact time: let the remover dissolve the product instead of trying to lift it in one forceful swipe. Avoid sharing mascara or eye tools, and do not add water or another liquid directly into a drying tube. Replace mascara according to the packaging guidance, and discard it sooner if the smell, texture or application changes.
Common mistakes that create clumps and smudges
- Using too much product: Wipe the wand before it reaches the lashes, particularly with a new tube.
- Applying coat after coat immediately: A brief pause makes layering more controlled.
- Starting only at the tips: This adds visible weight without defining the lash roots.
- Ignoring the lower lashes: Heavy lower lash application can transfer under the eyes. Use the wand tip and a minimal amount.
- Applying eye cream too close to the lash line: Excess slip can encourage smudging. Allow skincare to absorb first.
- Using an old, dry tube: A fresh mascara formula is usually easier to spread evenly. Never revive mascara by adding saliva or household liquids.
- Rubbing during removal: Soften the product first, then wipe with patience.
Makeup basics for mascara: the quick decision guide
Choose a slim or tapered wand when you want precision, short-lash definition or separated corners. Choose a fuller brush when volume matters more than a highly separated finish. Curl clean lashes before applying any formula, use the root-to-tip technique, and limit yourself to one or two spaced coats.
For a simple office or college look, use one coat on the upper lashes and a tiny amount on the lower lashes if needed. For weddings, parties or festive makeup, add a second coat after the first has settled and consider waterproof mascara if you expect humidity, tears or a long day. Remove it completely at night, especially around the lash roots.
Takeaway: The best makeup basics for mascara are controlled rather than complicated: the right wand, a pre-mascara curl, light root-to-tip strokes, patient layering and gentle removal will give you lifted lashes without unnecessary clumps.
Products that may help with this routine
Choose only what fits your skin, hair or personal needs. Use the links below to view current options on Amazon India.
Frequently Asked Questions
How to apply mascara without clumps?
Wipe excess formula from the wand, start at the lash roots, wiggle once, and sweep to the tips. Use one or two thin coats with a 30- to 60-second pause between them, then separate lashes with a clean spoolie if needed.
What is the best mascara wand for short lashes?
A slim, tapered or small curved wand is usually easiest for short lashes because it reaches the roots and corners without depositing too much product. A lengthening formula can add definition without the weight of a very dense brush.
Should you curl lashes before mascara?
Yes. Curl clean, dry lashes before applying mascara. Curling after the product dries may make mascara crack or pull on the lashes, and it can create an uneven bend.
How many coats of mascara should you apply?
One coat is generally enough for an everyday look, while two thin coats can add festive volume or length. Pause between coats and stop if lashes start sticking together.
How do you remove mascara without rubbing your eyes?
Hold a remover-soaked cotton pad over closed eyes for several seconds, then wipe downwards gently. Repeat with a clean section rather than scrubbing, especially when removing waterproof mascara.
How can you keep mascara from smudging in humid weather?
Use a longer-wear formula, let skincare absorb before makeup, keep lower-lash product minimal and avoid overly thick coats. Waterproof mascara can help for long or wet occasions but should be removed carefully.