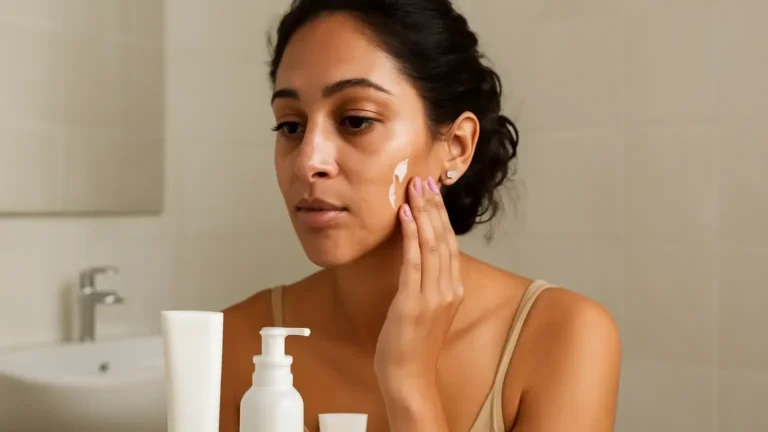
Acne prone skin and makeup brushes need a practical hygiene routine, not a promise of perfectly clear skin. This guide is for anyone who wears makeup while managing blemishes, especially in India’s heat, humidity and dust. Wash complexion tools weekly, clean them sooner after heavy or oily use, never share them, and pause brushing over sore or broken skin. These decisions reduce avoidable residue and irritation while keeping makeup application more comfortable.
Why acne-prone skin needs a thoughtful brush routine
Makeup brushes collect foundation, concealer, sunscreen, skin oil, dead skin cells and environmental dust. If residue stays damp inside dense bristles, it can also create a less hygienic surface for the next application. A dirty tool does not automatically cause every breakout, but dirty makeup brushes and acne can become a frustrating combination when the same residue is repeatedly pressed into already sensitive skin.
The goal is not to sterilise every item or scrub your face aggressively. Good makeup brush hygiene for acne prone skin means removing cosmetic build-up regularly, drying tools completely, using clean hands, and reducing friction. It also means recognising that a breakout may be influenced by hormones, product ingredients, sweat, occlusion or irritation rather than by brushes alone.
- Personal tools: Keep them for your own use and clean them on a predictable schedule.
- Shared tools: Avoid sharing complexion brushes, sponges and eye tools, even with family or friends.
- Active or damaged skin: Do not drag a brush over open, weeping, freshly picked or very painful areas.
How often should you wash makeup brushes for acne prone skin?
A useful starting point is to wash foundation, concealer and cream-product brushes once a week. If you use them daily, have very oily skin, sweat heavily, apply makeup over sunscreen, or live in a hot and humid environment, a more frequent schedule may feel more appropriate. Clean a brush immediately if it has touched a picked spot, broken skin, visible discharge or a product that smells or looks unusual.
| Tool or use | Practical cleaning schedule | Extra caution |
|---|---|---|
| Liquid foundation or concealer brush | About once weekly; sooner after heavy use | Dense bristles hold more residue |
| Powder, blush or highlighter brush | Every one to two weeks | Clean sooner if it looks oily or clumped |
| Makeup sponge | Rinse after every use and wash thoroughly several times weekly | Replace if it stays damp, tears or develops odour |
| Eye makeup brush | Weekly for regular use; sooner after irritation | Do not share, particularly near the lash line |
These are starting points, not medical rules. A brush that still feels greasy, smells stale or leaves uneven product needs cleaning regardless of the calendar. For makeup sponge hygiene, rinsing alone is not enough: squeeze out cleanser and water, then allow the sponge to dry in an airy place rather than inside a closed pouch.
How to clean makeup brushes without irritating acne
The safest approach is thorough but gentle. Harsh household detergents, very hot water and vigorous twisting can roughen bristles and make application more abrasive. Follow these steps for most washable brushes:
- Remove surface product. Wipe excess cream or liquid makeup onto a clean tissue or washable cloth.
- Wet only the bristles. Hold the brush with the head pointing down so water does not collect near the ferrule and handle.
- Use a mild cleanser. A gentle brush cleanser or mild, fragrance-light soap can loosen residue. Avoid mixing cleaning chemicals.
- Work product through the fibres. Massage carefully with your fingers or a textured cleaning mat without crushing the brush.
- Rinse until clear. Leftover cleanser can irritate skin and make the bristles stiff.
- Press, do not wring. Use a clean towel to remove water, reshape the head and dry the brush flat or with the bristles angled down.
Do not apply a strong alcohol spray as a substitute for washing. Disinfecting makeup brushes may be useful for a quick interim refresh on some compatible tools, but it will not remove all oil and pigment. Check the tool maker’s care guidance where available, and let any disinfectant evaporate fully before use.
Choose acne-prone skin makeup tools by contact and friction
There is no single best tool for every person. The right choice depends on how much pressure you use, whether a tool can be cleaned completely, and how easily your skin becomes irritated.
Brushes
Soft, tightly finished synthetic bristles can provide even coverage with less product dragging. A clean brush is often preferable to fingers when you want to avoid transferring oil from your hands, but repeated buffing over a tender spot may increase redness. Pat or press product onto a blemish instead of scrubbing it in.
Sponges
A damp sponge can create sheer, low-friction coverage when used by pressing rather than rubbing. However, it must be rinsed after use, dried properly and replaced when it cracks or smells. A sponge that remains wet in a sealed makeup pouch can become an unhelpful choice for acne prone skin makeup tools.
Fingers
Clean fingers are practical for small areas and cream products. Wash hands before application and avoid touching the face repeatedly during the day. Fingers are not automatically less hygienic than brushes; the key issue is whether both hands and tools are clean and whether application involves unnecessary pressure.
Product habits that support a cleaner makeup routine
Tool hygiene cannot compensate for a product that repeatedly stings, feels excessively occlusive or leaves a persistent rash-like reaction. Look for makeup labelled non-comedogenic makeup when that claim suits your preferences, but treat it as a useful screening point rather than a guarantee. Formula performance can vary from person to person.
- Prefer lightweight, oil-free makeup products if rich textures feel congesting on your skin.
- Check expiry guidance and the period-after-opening symbol; do not keep old liquid products indefinitely.
- Use a clean spatula or cotton bud for pot products instead of repeatedly dipping a brush into them.
- Keep caps closed and store products away from direct heat, bathroom steam and dusty surfaces.
- Remove makeup gently at the end of the day without scrubbing, then follow your usual skin-care routine.
Patch testing a new product on a small area can help you notice irritation before applying it everywhere, although it cannot predict every reaction. If a product causes burning, swelling or a spreading rash, stop using it and seek professional advice if symptoms persist or are concerning.
When to avoid brushing or makeup over a breakout
Makeup may be reasonable over intact, non-tender skin when applied lightly with a clean tool. Consider skipping that area when a spot is open, bleeding, crusted, very swollen, hot, painful or recently squeezed. Brushing over damaged skin can increase friction and may introduce product into the area.
If you need coverage, keep it local: use a clean cotton bud or the clean tip of a dedicated tool, apply a thin layer, and avoid repeated touch-ups. Do not seal an actively irritated area under multiple layers simply to improve coverage. Let the skin settle and remove makeup gently when you return home.
Seek a dermatologist’s advice for persistent, severe or painful breakouts, repeated reactions, or skin changes that do not improve with your ordinary routine. Beauty hygiene can reduce avoidable irritation, but it cannot diagnose or treat the underlying cause of acne.
Shared tools, storage and replacement decisions
Personal tools should not be lent out, especially products used around blemishes, lips or eyes. If professional makeup is applied, ask whether the artist uses disposable applicators or cleans reusable tools between clients. A clean-looking brush is not proof that it has been properly cleaned.
Good makeup tool storage is simple: keep clean, dry brushes upright or in a breathable holder, separate from used tools, and protect them from bathroom splashes. Do not place a wet sponge in a closed case. Wash storage cups and pouches regularly because clean brushes can be re-contaminated by a dirty container.
Follow when to replace makeup brushes as a practical decision rather than a fixed date. Replace a brush when bristles stay misshapen, shed heavily, develop a persistent smell, remain greasy after washing, or feel scratchy. Discard a sponge with tears, deep staining that will not wash out, odour or a texture that no longer rinses clean.
A simple weekly routine to remember
- After each use, remove excess product and store tools where they can dry.
- Rinse or wash sponges after use; do not leave them damp overnight in a pouch.
- Choose one weekly cleaning day for complexion and eye brushes.
- Clean sooner after illness, heavy sweating, a product spill or contact with broken skin.
- Check tools monthly for odour, roughness, shedding and trapped residue.
- Keep makeup personal, check product age and wash hands before every application.
Takeaway: acne prone skin and makeup brushes can coexist when tools are personal, fully cleaned and dried, products are chosen thoughtfully, and active or damaged breakouts are not rubbed. Consistency matters more than buying a large collection of specialised accessories.
Products that may help with this routine
Choose only what fits your skin, hair or personal needs. Use the links below to view current options on Amazon India.
Frequently Asked Questions
How often should you wash makeup brushes for acne prone skin?
Wash foundation, concealer and cream-product brushes about once a week, or sooner when they look oily, smell stale, hold heavy residue or touch broken skin. Wash sponges after each use and dry them fully.
How do you clean makeup brushes without irritating acne?
Use a mild brush cleanser, lukewarm water and gentle finger pressure. Rinse thoroughly, press out water without wringing, reshape the bristles and dry the brush completely before using it.
Are makeup sponges better than brushes for acne prone skin?
Neither is universally better. A clean, well-dried sponge may reduce dragging when pressed onto skin, while a soft brush can use less product. Choose the tool you can clean reliably and use without friction.
Can dirty makeup brushes cause breakouts?
Dirty brushes can transfer oil, cosmetic residue and environmental debris, and may worsen irritation or contribute to an unhygienic routine. Breakouts have multiple possible influences, so brushes are not always the sole cause.
What makeup tools are safest for active acne?
Use a clean, soft tool that can be washed and dried completely, and apply by pressing rather than buffing. Avoid using any tool over open, bleeding, crusted or very painful areas.
When should you avoid makeup on a breakout?
Avoid makeup over skin that is open, bleeding, crusted, very swollen, hot or painful, particularly after picking. If symptoms persist, worsen or look unusual, ask a dermatologist for guidance.