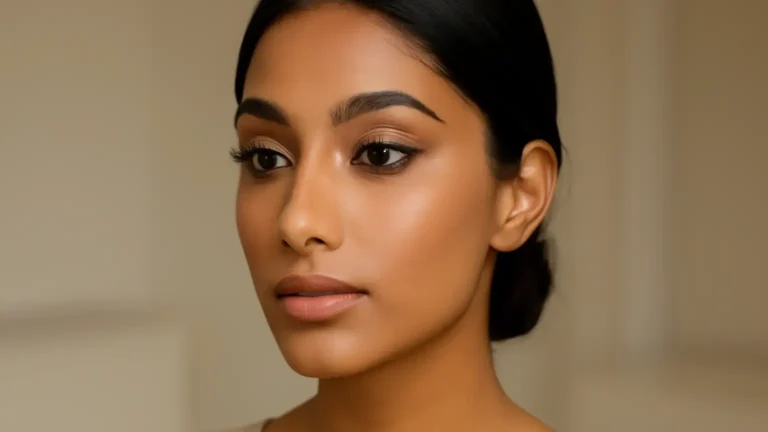
Makeup basics for concealer become much easier when you treat it as targeted coverage, not a second layer of foundation. For beginners doing everyday Indian makeup, match the shade to the area you are correcting, use the smallest amount that works, and place product only on darkness, redness or a mark. Thin layers, a suitable blending tool and selective setting will give a fresher finish—especially when your skin is dry, textured or exposed to heat and humidity.
What concealer is meant to do
Concealer is a concentrated complexion product used to reduce the appearance of specific areas such as under-eye darkness, redness, pigmentation or an occasional blemish. Foundation generally creates a more even overall base; concealer adds local coverage. Using the two for different jobs is the simplest way to avoid a heavy, cakey finish.
For most everyday looks, begin with foundation or skin tint if you use one, then assess what still needs attention. You may need far less product than expected. If your base already softens mild discolouration, concealer can be limited to the inner under-eye, around the nose or one visible mark.
This targeted approach suits everyday Indian makeup because it is comfortable in warm weather, looks more natural in daylight and is easier to touch up. It also lets you adjust coverage according to your skin texture instead of covering the entire face uniformly.
Start with concealer shade matching
The correct shade depends on both the area and the result you want. For blemishes and pigmentation, choose a concealer that closely matches the surrounding skin or your foundation shade. A noticeably lighter spot can draw more attention to the mark.
Choose by area
- Under-eye concealer: Choose a shade close to your complexion, or only slightly brighter if you want gentle lift. A very pale shade can make brown or grey darkness look ashy, particularly on medium to deep Indian skin tones.
- Blemish concealer: Match your skin or foundation as closely as possible. The goal is to disguise the spot, not highlight it.
- Redness: A skin-matching concealer usually works for mild redness. For stronger redness, a tiny amount of a suitable colour corrector can be placed first, followed by concealer.
Test potential shades along the jawline and look at them in natural light. The inside of the wrist is often a less useful test area because its colour and undertone may differ from your face. Give the product a moment to settle before deciding; some formulas deepen or appear less wet after setting.
How to apply concealer without overapplying
The most reliable technique is to build coverage gradually. You can always add another layer, but removing excess product without disturbing the base is difficult.
- Prepare the area. Apply moisturiser and allow it to settle. Around the eyes, use a small amount so the skin is comfortable but not slippery. On oily areas, avoid layering rich skincare immediately beneath concealer.
- Place small dots. Use a clean fingertip, doe-foot applicator or a small concealer brush to put a few tiny dots only where you see darkness or discolouration. Do not draw a large triangle beneath each eye unless you specifically want that heavier style.
- Pause briefly. Letting concealer sit for a few seconds can increase its coverage, but do not allow it to become dry and difficult to blend.
- Tap, rather than drag. Pat around the edges first, keeping the most product over the area that needs coverage. This preserves pigment and prevents the concealer from spreading across unaffected skin.
- Inspect before adding more. Turn your face towards a window or mirror at normal distance. Add a second thin layer only to the remaining visible mark.
These steps answer the practical question of how to apply concealer for beginners: use less than you think, keep placement precise and blend the perimeter rather than wiping away the centre.
Under-eye versus blemish placement
Different concerns need different placement. The under-eye area often benefits from strategic brightness, while a blemish needs camouflage with minimal movement.
For under-eye darkness
Look for the deepest shadow, which may sit at the inner corner, along the hollow or close to the lower lash line. Place a narrow amount there and extend only as far as necessary. The skin immediately beneath the eye can crease naturally, so covering the whole area with a thick layer may make lines more visible.
If darkness looks blue, purple, brown or grey through concealer, a very small amount of colour corrector may help. Select the corrector according to the depth and undertone of the discolouration, and keep it sheer. Too much corrector can mix with concealer and create an obvious orange or pink patch.
For spots and pigmentation
Place blemish concealer directly over the mark and tap around its edge. Avoid repeatedly brushing across the centre. If the spot is raised or the surrounding skin is flaky, makeup cannot change its texture; it can only reduce colour contrast. A natural finish is often more convincing than trying to make the area perfectly invisible.
Pick a blending tool for your skin and coverage
Your tool changes how much product remains on the skin. A fingertip offers warmth and control, but wash your hands first and use a light tapping motion. This is useful for a small area or a creamy formula.
A concealer brush is helpful for precise blemish placement, the sides of the nose and small areas of pigmentation. A small, firm synthetic brush deposits more coverage; a softer, fluffy brush diffuses the edges. Clean it regularly, particularly if it touches active-looking spots or oily areas.
A damp makeup sponge gives a softer, sheerer result and can remove excess product. Press it gently rather than bouncing aggressively over the skin. It is especially useful when your concealer appears too dense or when you want a seamless transition into foundation. A dry sponge generally absorbs less and may leave a heavier finish.
There is no universally best tool. Choose a fingertip for control, a brush for precision and a damp sponge for diffusion. You can also use one tool to place product and another to soften the edge.
Adjust coverage for skin texture
Texture determines how concealer behaves after several hours. On dry or flaky areas, use a comfortable, flexible or hydrating concealer, moisturise beforehand and avoid excessive powder. Pressing a damp sponge over the area can help reduce a visibly thick edge, but it will not replace skin preparation.
For oily skin, choose a formula that sets to a natural or soft-matte finish and use a thin layer. Too much emollient product may slide, especially around the nose and in humid weather. Blotting gently before touch-ups is usually better than adding fresh concealer over oil.
For visible pores, acne marks or uneven texture, use targeted coverage instead of a large layer. A full coverage concealer can be useful on a small mark, but apply it locally and keep the surrounding layer sheer. On mature or naturally lined skin, flexible coverage and minimal powder generally look more comfortable than a very matte, opaque finish.
If the product settles into lines, wait until the rest of your makeup is complete, then use a clean fingertip to tap away the excess before setting. This small correction is often more effective than adding another layer.
Set only where setting is needed
Setting powder can reduce transfer and help concealer last, but applying it everywhere may emphasise dryness or texture. Use a small brush or puff to press a fine amount over areas that crease or become shiny, such as the inner under-eye, sides of the nose or a spot.
For dry under-eyes, leave the area lightly set or skip powder if the formula remains stable. For oily skin, a finely milled setting powder can improve wear; press rather than sweep so you do not disturb the coverage. A pressed powder may be convenient for touch-ups, while a loose powder can provide a lighter initial set when used sparingly.
Spray is optional, not essential. If you use a setting spray, follow the product directions and allow the face to dry without rubbing. No setting method can guarantee that concealer will not crease, particularly in expressive areas.
Common concealer mistakes to avoid
- Using one bright shade everywhere: Brightening shades belong mainly to selected areas. They are not automatically suitable for blemishes or pigmentation.
- Applying before checking the base: Foundation may already provide enough coverage. Assess first, then add concealer.
- Using too much under the eyes: More pigment does not always mean a smoother look. Start with a few dots.
- Dragging during blending: This moves product away from the concern and can expose the mark again.
- Powdering automatically: Set according to wear needs and skin texture, not habit.
- Ignoring undertone: A shade can be light enough but still look grey, pink or orange if its undertone is unsuitable.
A simple everyday routine
For a quick routine, moisturise, apply sunscreen during the day and allow skincare to settle. Add foundation or skin tint only if you want overall evening. Next, use matching concealer on visible marks and a slightly brighter or closely matched shade under the eyes, depending on your preference. Blend the edges, inspect in natural light and set only the areas that crease or shine.
For an event, build the same routine in thin concealer layers rather than beginning with a thick application. Take a short break between layers, check the finish from different angles and keep the high-coverage product confined to areas that need it. This gives you control without making the entire complexion look masked.
Takeaway: precise placement creates a lighter finish
The most useful makeup basics for concealer are simple: match the shade to the job, place product only on the concern, blend the edges and build coverage slowly. Under-eye darkness, blemishes and texture need different decisions, so one technique should not be forced across the whole face. When in doubt, remove excess before adding more and let your natural skin remain visible.
Products that may help with this routine
Choose only what fits your skin, hair or personal needs. Use the links below to view current options on Amazon India.
Frequently Asked Questions
How do I apply concealer for beginners?
Start with moisturised skin and a small amount of concealer on the area that needs coverage. Tap it into place, blend only the edges, inspect the result and add a second thin layer if necessary. Set selectively rather than powdering the entire face.
Where should I put concealer under my eyes?
Place it over the darkest areas, which are often the inner corner, the hollow or the lower lash line. Use a narrow amount instead of covering the entire under-eye with a thick triangle, then tap the edges into the surrounding base.
What is the best concealer for textured skin?
A flexible, natural-finish concealer applied in a thin layer is usually easier to wear on textured skin than a very thick, dry formula. A hydrating formula may suit dry texture, while oily skin may prefer a lighter formula that sets without excess powder.
Should concealer be lighter than foundation?
Not always. Under the eyes, a shade that matches or is only slightly lighter than your skin can brighten naturally. For blemishes and pigmentation, a close match to your skin or foundation is usually better so the mark is not highlighted.
How can I stop concealer from creasing?
Use less product, allow skincare to settle, tap away excess after the rest of your makeup is applied and set only the crease-prone area with a small amount of powder. Some natural movement is normal, especially under expressive eyes.
How much concealer should I use?
Begin with a few small dots over the specific concern. Add coverage in thin layers until the colour is softened, stopping before the product spreads well beyond the area. The required amount varies with formula, pigmentation and the finish you want.