Makeup basics for mascara come down to three choices: select a wand that matches your lash goal, remove excess before it touches the eye, and build thin coats from root to tip. This guide is for beginners and anyone whose mascara clumps, smudges or weighs lashes down. You will learn a quick routine for lifted, separated lashes, plus how to handle lower lashes, waterproof formulas, removal and the point at which an old tube should be discarded.
Mascara can make the eyes look more awake in a few strokes, but the result depends less on moving the wand quickly and more on controlling the amount of formula. A good application leaves lashes lifted, separated and flexible rather than stiff or spidery.
Choose the wand and formula for your lash goal
The wand affects where the product goes. Before applying, decide whether you want length, volume, curl or everyday definition. Formula and brush work together, so a dramatic product is not automatically the best choice for a natural look.
- For length: Choose a slim brush with short or evenly spaced bristles. It can reach shorter lashes and coat the tips without depositing too much product.
- For volume: A fuller brush and a thicker formula add density. Use a light hand, because a large brush can collect extra product and create clumps.
- For curl: A curved mascara wand can support a lifted appearance, especially after a careful lash curling technique. Press the curler near the roots, then gently at the middle of the lashes; never clamp on mascara-coated lashes.
- For separation: A slim, flexible brush with defined bristles is useful when your lashes naturally sit close together or when you prefer a clean daytime finish.
A lengthening mascara usually suits short or fine lashes, while a volumising mascara is better when the main concern is sparse-looking lashes. If your eyes water easily, consider a formula labelled for long wear, but remember that waterproof mascara removal needs more care. A mascara primer may help some people create extra grip or fullness, although it is optional rather than essential for beginners.
Prepare for a cleaner application
Start with clean, dry lashes. Oils from eye cream, sunscreen or a rich concealer can make mascara slide and contribute to mascara smudging. Let nearby skincare settle, then gently press away any excess shine with a clean tissue or cotton bud.
If you use an eyelash curler, curl bare lashes before mascara. Check that the rubber pad is intact and place the tool close to the lash roots without pinching the skin. One gentle press is usually safer and more controlled than repeatedly squeezing.
How to apply mascara without clumps
These steps form a reliable beginner routine and work for most standard mascara formulas.
- Remove excess from the wand. Pull the wand out slowly and wipe one side lightly against the tube opening or a clean tissue. Do not pump the wand repeatedly, as this pushes air into the tube and can dry the formula faster. The brush should look coated, not overloaded.
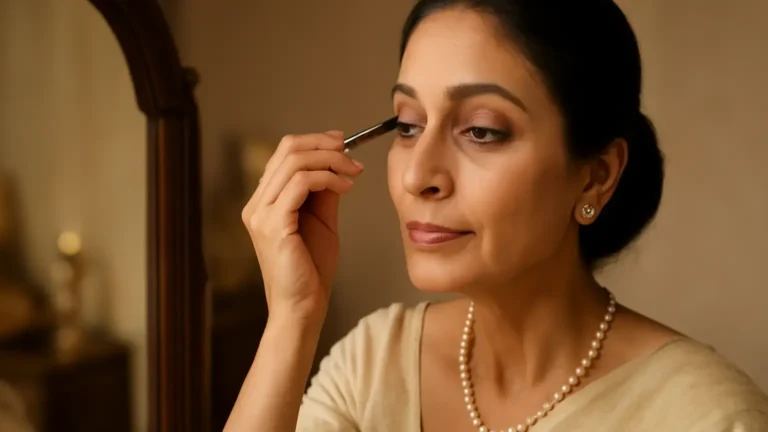
- Anchor at the roots. Look slightly down into a mirror while keeping the face relaxed. Place the brush at the base of the upper lashes and wiggle it gently once or twice. This deposits colour where definition matters most.
- Move from root to tip. Sweep the brush upwards in a slow, controlled motion. For the outer lashes, angle the wand slightly towards the temple; for the centre, guide it towards the brow. This creates lift without forcing every lash into one stiff shape.
- Separate as you go. Use the tip of the brush to catch missed lashes, but do not repeatedly comb through wet product. If two lashes stick together, use a clean mascara wand or a dedicated lash comb while the coat is still slightly workable.
- Let the first coat set briefly. Wait around 20 to 40 seconds, depending on the formula. Applying the next layer while the first coat is still wet can move product around; waiting until it is completely hard may create flakes.
- Build only where needed. Add a second thin coat to the outer or upper lashes rather than covering every lash heavily. Most beginners need one coat for definition and two for a more noticeable look.
The key to clump-free lashes is not a perfectly clean brush at every moment. It is a small amount of product, steady pressure and enough time between layers. If the tips begin to gather into spikes, stop adding formula and separate them with a clean mascara wand or lash comb.
Lower-lash mascara needs a smaller movement
Lower lashes are shorter, finer and closer to the skin, so a full-size brush can leave marks beneath the eyes. For lower lash mascara, hold the wand vertically and touch the tip to individual lashes, or use a slim brush designed for detail work.
Wipe off most of the excess first. Rest your little finger lightly against the cheek for stability, then make short downward taps rather than sweeping a large brush across the whole lash line. One light coat is usually enough. If your lower lashes transfer onto the skin, skip them or use a smaller, quick-drying formula.
For a softer daytime look, apply mascara mainly to the upper lashes and the outer half of the lower lashes. This gives definition without making the eye area look heavy.
How to prevent smudging, flakes and heavy lashes
When mascara transfers to the skin
Wait for the product to dry before correcting a mark. A dry spot often lifts away with a clean cotton bud without disturbing concealer. Persistent transfer may come from a rich eye product, oily lids, humid weather or a formula that remains too flexible for your eye shape. A tubing mascara or a long-wear formula may be worth comparing, but always remove it according to its instructions.
When the lashes look too thick
Excess formula is usually the issue, not a need for more brushing. Wipe the wand more thoroughly, use fewer coats and concentrate the second layer on the outer lashes. Avoid adding more mascara to fix a clump; a clean lash comb is a better correction.
When waterproof mascara is the right choice
Waterproof mascara can be useful for a humid day, monsoon weather, emotional occasions or eyes that water. It is not necessary for every routine, and its stronger staying power means you should avoid rubbing during removal. If your lashes feel dry or the eye area becomes uncomfortable, switch to a gentler everyday formula when appropriate.
Remove mascara without pulling at the lashes
Good removal is part of a complete mascara routine. Saturate a cotton pad with a bi-phase eye makeup remover or another product suitable for eye makeup. Hold it over the closed eye for several seconds to soften the formula, then wipe downwards and outwards with light pressure. Repeat with a fresh section of the pad instead of scrubbing.
For waterproof mascara removal, an oil-based remover or cleansing balm can dissolve the film more effectively than plain water. Keep the eyes closed, rinse away residue and cleanse the surrounding skin gently. Do not tug individual lashes or use a dry towel to rub the eye area. If burning, marked redness or ongoing watering occurs, stop using the product and seek professional medical advice if symptoms persist or are concerning.
Know when to replace your mascara
Mascara shelf life matters because the wand repeatedly travels from the tube to the eye area. As a practical rule, replace mascara about three months after opening, or sooner if the packaging gives a shorter period-after-opening recommendation. Write the opening date on a small label if you tend to forget.
Discard it sooner if the smell changes, the texture becomes unusually dry or stringy, the tube separates, or the product causes irritation. Do not add water, oil or saliva to revive a drying tube, and do not share mascara because the eye area is sensitive. Keep the cap closed firmly and avoid pumping the wand.
A simple routine for different occasions
- Everyday office or college look: Curl bare lashes, wipe the wand, apply one root-to-tip coat and add a little to the outer lashes.
- More definition: Use a separating or lengthening formula for the first coat, wait briefly and add a thin second coat to the upper lashes.
- Humidity or a long event: Choose waterproof mascara if you need its staying power, but plan enough time for gentle removal later.
- Very short lashes: Use a slim brush, work in small sections and look for the best mascara wand for short lashes rather than choosing only by a bold volume claim.
Common mistakes to avoid
- Applying mascara before curling lashes, which can make lashes stick to the curler.
- Leaving a large blob of formula on the wand tip.
- Pumping the wand in and out of the tube, which introduces air.
- Adding coat after coat before the previous layer has settled.
- Using a large brush horizontally on delicate lower lashes.
- Sleeping in mascara or rubbing hard to remove it.
- Keeping the same tube long after its texture or smell changes.
Quick takeaway
Effective makeup basics for mascara are simple: choose a wand suited to your lash goal, wipe away excess, wiggle at the roots, sweep to the tips and pause before layering. Use a smaller movement on lower lashes, remove waterproof formulas with a suitable cleanser and replace mascara roughly every three months after opening. These habits create lift and definition while reducing clumps, transfer and unnecessary tugging.
Products that may help with this routine
Choose only what fits your skin, hair or personal needs. Use the links below to view current options on Amazon India.
Frequently Asked Questions
How do I apply mascara without clumps?
Wipe excess formula from the wand, place it at the lash roots, wiggle gently and sweep to the tips in one controlled motion. Wait 20 to 40 seconds before adding a thin second coat, and separate any sticking lashes with a clean wand or lash comb.
What is the best mascara wand for short lashes?
A slim wand with short or evenly spaced bristles is usually easiest for short lashes because it can reach the roots and corners without depositing too much product. A lengthening formula can complement this shape.
How many coats of mascara should beginners use?
Start with one coat for definition. Add a second thin coat after the first has briefly settled if you want more impact. More coats are not always better and can make lashes heavy or clumpy.
How do I apply mascara to lower lashes?
Wipe most of the formula off, hold the wand vertically and use short taps on individual lower lashes. One light coat is generally enough; a slim detail brush can reduce marks beneath the eyes.
When should I replace mascara?
Replace mascara about three months after opening, or sooner if the product smells different, becomes unusually dry or stringy, separates, or causes eye discomfort. Follow the packaging guidance if it recommends an earlier period.
How can I remove waterproof mascara safely?
Hold a cotton pad soaked with a suitable bi-phase eye makeup remover or cleansing balm over the closed eye for several seconds, then wipe gently downward and outward. Avoid scrubbing or pulling at lashes.