These mascara application tips are for anyone who wants lifted, defined lashes without a heavy or spidery finish. Curl first, place the mascara wand at the roots, wiggle through to the tips, and let each thin layer settle before adding more. The right formula also matters: lengthening mascara suits short or fine lashes, while volumising mascara works better when fullness is the priority. A gentler lower-lash technique and careful removal complete the look.
Mascara can change the look of the eyes in minutes, but the result depends on more than sweeping a brush through the lashes. Curling pressure, formula choice, wand control, layering and removal all affect whether lashes look lifted and separated or weighed down and clumpy.
1. Choose the formula for your lash goal
Start by deciding what you want mascara to do. Fine, short lashes often benefit from a lengthening mascara with a slim, precise brush. It deposits product along individual lashes and can make the eyes look more open without adding too much weight. If your lashes are sparse or naturally light, a volumising mascara can create a fuller appearance, but use small amounts to prevent the tips from sticking together.
Formula texture is just as important as the label. A wetter formula may give a glossy, dramatic finish but can be harder to control on straight lashes. A lighter, quick-setting formula may hold a curl more effectively. For long days, humidity or emotional occasions, waterproof mascara can improve staying power, although it usually requires more careful removal. It is not necessary for every everyday eye makeup look.
If your eyes water or feel easily irritated, choose a product labelled for sensitive eyes mascara needs and avoid applying it directly to the waterline. Stop using any eye product that causes persistent burning, swelling or unusual redness. If symptoms continue after makeup is removed, seek medical advice.
2. Prepare and curl lashes safely
Clean, dry lashes give mascara a more even base. Remove oily skincare residue from the eyelids and lashes, then allow the area to dry. Excess eye cream or makeup remover can make mascara slide and may prevent a curl from holding.
How to curl lashes before mascara
Use a clean lash curler before mascara, never after the product has dried. Open the curler fully, position it close to the lash roots without pinching the eyelid, and hold gently for about five to ten seconds. Move slightly towards the middle and then the tips if you want a rounded curve rather than a sharp bend. One controlled squeeze is better than repeated force.
People with straight lashes may prefer a curler with a broader curve, while deep-set eyes may find a narrower design easier to position. Check the pad regularly and replace it when it becomes cracked or flattened. A damaged pad can pull lashes or create an uneven bend.
3. Control the mascara wand at the roots
The most reliable root-to-tip application begins with a small amount of product on the wand. After removing the brush from the tube, lightly wipe one side against the opening. Do not pump the wand repeatedly, as this pushes air into the tube and can dry the formula faster.
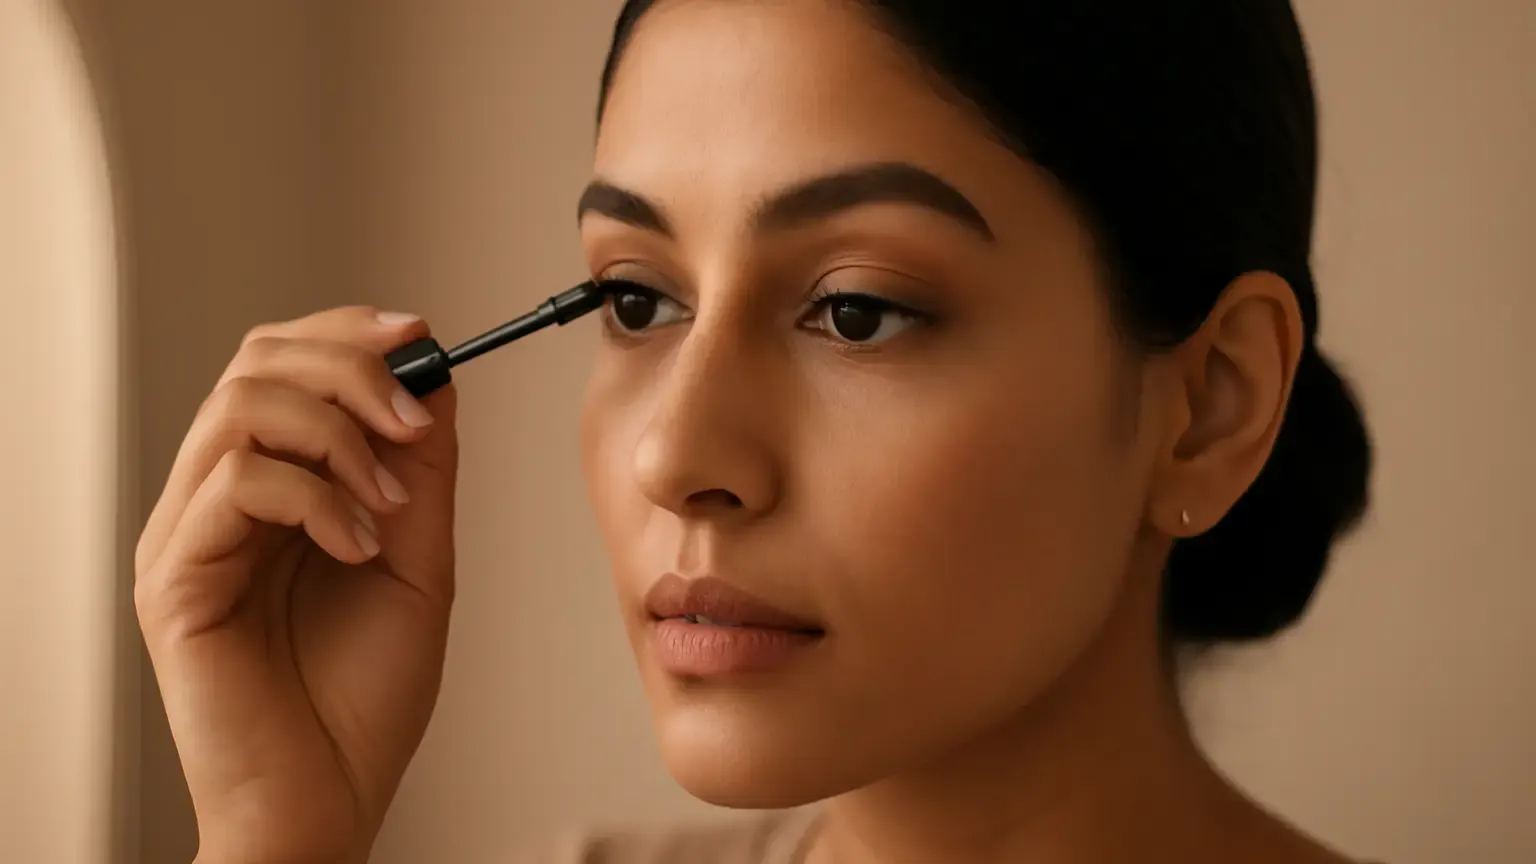
Look slightly down into a mirror while keeping the eyelid relaxed. Place the wand near the base of the upper lashes, avoiding the skin and waterline. Wiggle it gently from side to side at the roots, then pull through to the tips in one smooth motion. This deposits more product where support and definition are needed, while leaving the ends lighter and less likely to droop.
For the inner lashes, turn the wand vertically or use only the tip. Sweep outward for a softly elongated effect. On the outer lashes, angle the brush towards the temple to add definition without forcing every lash into a uniform, overly rounded shape. This adjustment can complement different eye shapes without requiring a dramatic makeup style.
4. Build thin layers instead of one thick coat
One heavy coat is a common cause of clumps. For clump-free lashes, apply a thin first layer, wait briefly until it is set but not completely hard, and then add a second coat only where more definition is needed. Concentrate the second pass at the roots or outer lashes instead of covering the entire length repeatedly.
A lash primer can help some people create a fuller base, particularly when lashes are fine. However, too much primer followed by several coats of mascara may make lashes feel stiff. Use a very light layer and allow it to become slightly tacky before applying mascara. If the finished lashes begin to stick, separate them with a clean lash comb while the product is still workable.
When to stop layering
Stop when the lashes look separated from normal conversation distance and the tips still appear flexible. More product does not always mean more impact. If the brush starts dragging, the formula forms small beads, or lashes look thick at the base but bare at the tips, the coat is probably too heavy. Wipe excess product from the wand before correcting rather than adding another wet layer.
5. Adapt the technique for lower lashes and everyday makeup
Lower lashes need less product because they are shorter and sit close to the under-eye area. For how to apply mascara to lower lashes, hold the wand vertically and use the tip to touch individual lashes. A small, narrow brush gives better control than a large fluffy one. Look straight ahead or slightly up, keep the face relaxed, and use one light pass.
If lower-lash mascara frequently smudges, skip it for a soft daytime look or choose a tubing-style formula designed to resist transfer. You can also apply only to the outer lower lashes for subtle definition. Avoid coating the lower lashes heavily when you have a close-set eye shape or when the under-eye area already has strong concealer; a dense line can make the eyes look visually smaller.
For an everyday eye makeup routine, curl the upper lashes, apply one controlled coat, and add a second coat only to the outer half if desired. This gives definition while leaving the look balanced with minimal eyeshadow. For a more polished evening finish, add a little extra product at the upper roots and outer corners rather than repeatedly combing the tips.
6. Fix clumps, flakes and smudges without starting over
Small clumps are easiest to correct before mascara fully dries. Use a clean spoolie or lash comb and comb from the roots towards the tips with light pressure. Wipe the tool between passes so you do not redistribute excess product.
For a fresh smudge on the eyelid, wait until it dries completely, then lift it away with a dry cotton bud. Removing a wet mark immediately can spread pigment across the lid. If mascara flakes under the eyes, brush the flakes away with a clean, dry tool before touching up concealer.
Common mistakes include curling after mascara, using an overloaded wand, repeatedly pumping the tube, and applying a new coat over fully hardened layers. Another mistake is choosing waterproof mascara for every occasion when a washable formula would be easier on the lashes and simpler to remove. Match the product to the day, weather and desired finish.
7. Remove mascara gently and keep the wand hygienic
Good mascara removal protects the delicate eye area from unnecessary rubbing. Saturate a cotton pad with a suitable eye makeup remover and hold it over the closed eye for several seconds. This gives the formula time to loosen. Wipe downwards and outwards rather than scrubbing side to side. Repeat with a fresh section of the pad until no visible residue remains.
Waterproof formulas may need an oil-based or bi-phase remover, while washable formulas may come away with a gentle water-based product. If you wear contact lenses, remove them according to your usual eye-care routine before cleansing and follow the product instructions. Do not pull at lashes or use sharp tools to remove dried mascara.
Keep the mascara wand inside its original tube and avoid sharing eye products. Wipe only the outside of the tube if needed; adding water, oil or saliva to the formula can introduce contamination and alter its performance. Close the cap firmly after each use and do not leave the product open while doing the rest of your makeup.
How often should you replace mascara?
Replace mascara according to the product’s period-after-opening guidance, and sooner if the smell, texture or application changes. Many eye makeup users choose to replace mascara around every three months because the product is repeatedly exposed to air and sits close to the eyes. Treat three months as a common hygiene benchmark, not a substitute for the manufacturer’s instructions.
Discard it immediately if it develops an unusual odour, becomes dry and flaky, or causes irritation. Never revive mascara by adding water or another liquid. A fresh tube is safer and usually applies more evenly than a product that has become thick and stringy.
Quick takeaway
The best mascara application tips are simple: choose a formula that matches your lash goal, curl before applying, start at the roots, use thin layers and treat lower lashes with a smaller amount of product. Correct mistakes with a clean tool, remove mascara without rubbing, and replace old tubes on time. These habits create lift and definition while keeping the finish comfortable for everyday wear.
Products that may help with this routine
Choose only what fits your skin, hair or personal needs. Use the links below to view current options on Amazon India.
Frequently Asked Questions
How do you apply mascara without clumps?
Wipe excess product from the wand, place it at the lash roots, wiggle gently and pull to the tips. Use thin layers, allow each layer to settle briefly, and separate lashes with a clean spoolie or lash comb before the formula fully dries.
How do you curl lashes before mascara?
Curl clean, dry lashes before applying any mascara. Position a clean lash curler close to the roots without pinching the eyelid, hold gently for five to ten seconds, then repeat closer to the middle or tips if you want a softer curve.
What is the best mascara technique for short lashes?
Choose a slim lengthening formula, wipe off excess product and use the wand tip to reach the roots and inner-corner lashes. Wiggle at the base and pull upwards, adding a second light coat mainly to the upper lashes.
How do you apply mascara to lower lashes?
Hold the wand vertically and use its tip to touch the lower lashes individually. Apply one light pass, concentrating on the roots. If the product transfers, use less, skip the lower lashes or try a tubing-style formula.
How do you remove mascara without rubbing your eyes?
Hold a remover-soaked cotton pad over the closed eye for several seconds to loosen the formula, then wipe gently downwards and outwards. Repeat with a clean section instead of scrubbing or pulling at the lashes.
How often should you replace a mascara?
Follow the product’s period-after-opening guidance; around three months is a common hygiene benchmark for mascara. Replace it sooner if the smell, texture or application changes, or if it causes irritation.