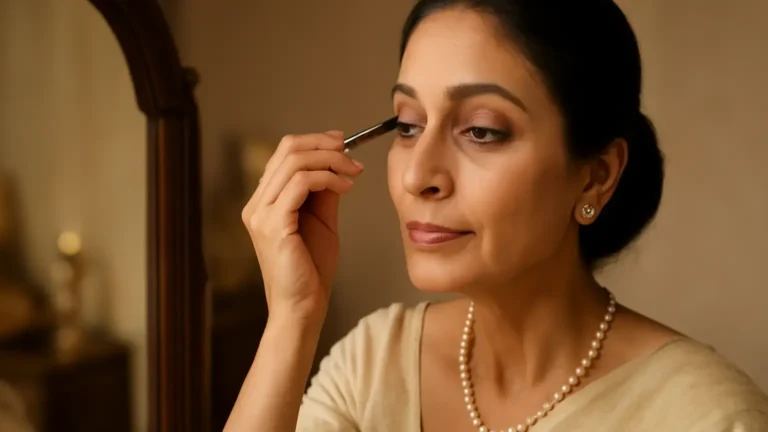
Makeup basics for colour corrector are simple: identify the visible undertone of a mark, apply a tiny amount of its complementary shade, then cover it with concealer. This guide is for anyone dealing with under-eye darkness, pigmentation or post-blemish marks who wants even coverage without a thick base. The key decision is placement, not piling on product—use colour corrector only where the unwanted tone shows, and keep every layer sheer.
Colour corrector is a tinted makeup product that visually neutralises an unwanted tone before concealer or foundation is applied. It does not erase pigmentation or change the skin itself. Instead, it reduces the amount of concealer needed to make a mark look less noticeable.
The most useful principle is complementary colour theory: colours opposite each other on the colour wheel can balance one another. In everyday makeup, this means an orange or peach tone can soften blue or purple shadows, while green can reduce the appearance of redness. The correct shade depends on the colour and depth of the concern, as well as your skin tone.
Choose the correct shade for the concern
Do not choose a corrector only because it is marketed for a particular area. Look closely at the mark in natural daylight and identify whether it appears blue, purple, brown, red or grey. A shade that neutralises one concern may look obvious on another.
- Peach corrector for under-eyes: Peach is useful for light to medium blue, purple or grey under-eye shadows, particularly on lighter to medium Indian skin tones.
- Orange corrector for Indian skin: Orange generally suits medium-deep to deep complexions when under-eye darkness or pigmentation has a blue, purple or brown-grey cast. A burnt orange or terracotta version may look more natural than a bright orange.
- Green corrector for redness: Green can soften the appearance of red blemishes, irritation-like redness or marks around the nose. Use it sparingly because too much can leave a pale or muddy cast.
- Lavender corrector for dullness: Lavender can add visual brightness to areas that look yellowish or sallow. It is usually better for broad, subtle dullness than for a distinct dark mark.
There is no universal “best” shade. For the question “which colour corrector is best for Indian skin?”, the answer is the one that balances the mark without becoming visible after concealer is applied. Indian skin ranges from very light to deep, with warm, neutral and cool undertones, so depth and undertone both matter.
How to use colour corrector: a precise routine
1. Prepare the skin lightly
Start with clean, moisturised skin and allow skincare to settle. If the under-eye area is dry, use a small amount of moisturiser rather than a heavy layer that may cause creasing. For daytime makeup, apply sunscreen as part of your normal routine and allow it to set before makeup.
2. Test the shade away from the most visible area
Place a small amount along the jawline or on a less noticeable patch near the concern. The corrector should look balanced after a very thin layer of concealer, not necessarily perfect on bare skin. If it remains bright orange, pink or green, the shade is too strong for the amount you are using or needs a more suitable concealer over it.
3. Apply only to the discoloured area
Use a small flat brush, pointed brush or clean fingertip to tap the product directly over the shadow. For dark circles, follow the darker inner corner, hollow or lower edge rather than spreading corrector over the entire under-eye. For pigmentation makeup, trace the brown or grey areas instead of covering the whole cheek.
4. Sheer out the edges
Tap around the border until there is no hard line. Keep the centre of the mark covered and the surrounding skin almost product-free. This targeted application prevents a patch from becoming thick when concealer is added.
5. Add concealer in a thin layer
Wait briefly for the corrector to settle, then press concealer over it. A cream concealer with medium, buildable coverage is often easier to control than an immediately heavy formula. Match the concealer to the surrounding skin for spot coverage; for the under-eyes, a slightly brighter shade can be used if you want a lifted effect, but avoid a very pale shade over deep darkness.
6. Build only where necessary
Let the first layer settle before deciding whether more is needed. If a mark still shows, add a pinpoint amount of corrector or concealer to that spot rather than applying another full layer across the area. This is how colour corrector can help you use less overall concealer while keeping the finish natural.
Colour corrector before concealer: why the order matters
For most complexion routines, colour corrector before concealer is the easiest order to control. The corrector first neutralises the visible tone; concealer then brings the area closer to the surrounding skin. Applying concealer first and corrector on top can work for a very specific spot, but it often makes the coloured product more visible and disturbs the base underneath.
A simple order is:
- Skincare and sunscreen, if used during the day.
- Primer, if it is part of your routine.
- Colour corrector on the selected areas.
- Foundation, if you wear it.
- Concealer where extra coverage is required.
- Light setting powder where creasing or transfer is a concern.
If you prefer applying foundation after spot correction, use tapping motions rather than dragging. A makeup sponge blending technique can soften the edges, but do not repeatedly bounce over one mark and lift the product away. A small brush offers more control for tiny post-acne marks, while a fingertip can provide gentle warmth for the under-eye area.
Adjust the technique for different concerns
Under-eyes and dark circles
Keep the product away from the lash line if it tends to crease there. Apply a small crescent or a few dots only where the darkness is strongest. Peach may suit lighter shadows, while orange or terracotta may be more effective for deeper blue-brown discolouration. Use less product near fine lines and press, rather than rub, when blending.
Pigmentation and uneven patches
For flat brown or grey pigmentation, use a pinpoint brush and work in small sections. Do not automatically choose a bright orange shade; a muted peach, apricot or terracotta may blend more easily depending on your complexion. Keep the outer edge thin so the patch does not appear raised or obvious.
Post-acne marks and blemishes
Post-acne marks may be red, brown or both, so inspect each one individually. Use green for a distinctly red mark and a peach, orange or terracotta tone for a brown-grey mark. If the blemish is raised, avoid rubbing or pressing heavily. A full coverage concealer may cover the colour, but it can look heavier than a small corrector-and-concealer combination, so build gradually.
How much product should you use?
Begin with less than a small pea-sized amount for both under-eyes, and much less for one spot. Corrector should tint the area, not form an opaque, wet layer. If you can clearly see a bright stripe before concealer, remove some with a clean fingertip or lightly tap over it with a damp sponge.
Coverage also depends on the finish you want. For everyday makeup, thin layers give more flexibility and usually wear more comfortably in India’s heat and humidity. For an event, you can add coverage in controlled stages, but allow each layer to settle. Heavy application from the beginning is harder to blend and more likely to crease, separate or look textured.
Common colour-correcting mistakes
- Using too much colour: A corrector is not meant to provide the final visible colour. Start with a dot, not a swipe.
- Correcting the entire face: Apply only where discolouration is present. Broad application can make the complexion look dull or unnecessarily layered.
- Ignoring undertone: A bright orange may clash with a light or neutral complexion. A muted version may be easier to conceal.
- Blending away the centre: Soften the edges while leaving enough product over the mark to neutralise it.
- Using a very pale concealer: A light shade can turn deep darkness grey. Choose a skin-matched or subtly brightening concealer instead.
- Skipping a wear test: Check the result in daylight and after some time. A product that looks invisible indoors may appear warm, grey or cakey in outdoor light.
Who should use colour corrector?
Colour corrector is useful for people who find that concealer alone leaves under-eye darkness, redness or stubborn marks visible. It is especially helpful when you want localised coverage rather than a full-coverage base. It is not essential for every routine: if a regular concealer already covers the concern comfortably, adding another product may create unnecessary texture.
Choose a formula that suits the area. A flexible, hydrating texture can be more comfortable under the eyes, while a drier, more precise formula may stay in place on a small blemish. Avoid applying makeup over broken or uncomfortable skin. If redness, swelling, pain or a persistent skin change concerns you, speak with a dermatologist rather than relying on makeup to conceal it.
Quick takeaway
The makeup basics for colour corrector come down to three decisions: identify the visible tone, choose a complementary shade that suits your skin depth, and apply it only where needed. Keep the layer sheer, blend the edges, and follow with concealer in small amounts. Used this way, colour corrector improves targeted coverage without making the entire complexion feel heavy.
Products that may help with this routine
Choose only what fits your skin, hair or personal needs. Use the links below to view current options on Amazon India.
Frequently Asked Questions
How to use colour corrector for dark circles?
Choose peach for lighter blue or purple shadows and orange or terracotta for deeper blue-brown darkness. Tap a very thin layer only over the darker areas, soften the edges, then press skin-matched concealer over it.
Which colour corrector is best for Indian skin?
There is no single shade for every Indian complexion. Peach may suit lighter to medium skin and orange, burnt orange or terracotta may suit medium-deep to deep skin when the concern looks blue, purple or brown-grey. Select the shade according to the mark and your skin depth.
Should colour corrector go before concealer?
Yes, colour corrector usually goes before concealer. Corrector first balances the unwanted tone, and concealer on top brings the area closer to the surrounding skin. Apply both in thin layers.
How to apply colour corrector on pigmentation?
Use a small brush to place corrector directly on brown, grey or uneven patches. Keep the centre covered but blend the edges finely, then add a matching concealer. Avoid spreading the product across clear skin.
Can colour corrector cover acne marks?
It can reduce the visible red, brown or grey tone of an acne mark, but it does not change the mark itself. Use green for clear redness or a peach-to-orange shade for brown-grey discolouration, followed by a small amount of concealer.
How much colour corrector should I use?
Start with a tiny dot and add only if the tone is still visible. The corrector should neutralise the mark without looking bright or opaque before concealer. Thin, targeted layers are easier to blend and less likely to crease.